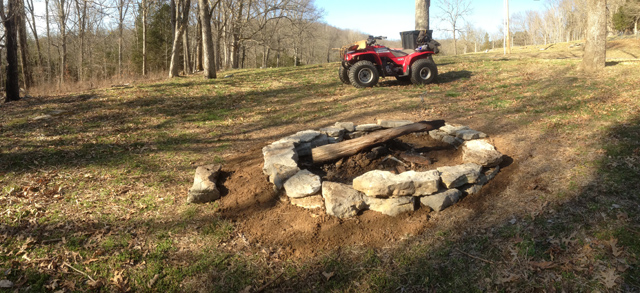
We’re supposed to have some awesome weather this weekend here in Middle Tennessee, so I spent some time today building a fire pit where we burned some brush a couple weeks ago.
We’ve got a couple of farm projects this weekend to get us ready for Spring, but sometimes you have to make time to sit and stare at a fire, drink some good beer, and listen to the coyotes howl.
The Winter hours have really kept us busy on the farm. We cleared an acre of fallow pasture, planted apple trees and blueberry bushes, made tons of compost, got seeds ordered and planted, and created garden beds. Thanks to the Rodale Institute and our certifying agent we are now in the inspection phase for USDA Organic Certification.
Our values are our certification at the end of the day, but recognition for going the extra mile doesn’t hurt. Our reward is knowing this labor of love will ensure the food we grow meets the highest quality standards our community deserves.
How to build a firepit using manufactured stone
Here is a very popular tutorial I did for those who do not have access to real stone or want the look of manufactured blocks. Each photo in the series is captioned with instruction. Like us on Facebook to see future projects.


Sounds idyllic, except those aren’t coyotes howling, they’re chihuahuas.
It’s looking good and staring at a fires reflection is like stopping to smell the roses! I am happy to see that as you build your farm
Ha ha! What’s weird is the dogs don’t seem to react as much to the coyotes. I’ll have to record them howling at night and post it soon. They yip and howl in packs pretty nearby.
Oh I love this! Great job! I have a round concrete area in my backyard that is unfortunately not leveled. Do you have any idea how I can build such a fabulous firepit on top of unleveled concrete? I wonder how I could possibly level it? And in addition I won’t be able to dig so I wonder if it still could work by putting the stones on top of the concrete?
Camille, if you don’t mind the fire pit walls being perpendicular to the pavement, you can stack a ring of manufactured stone about two or three high. If you want the walls to be level, you might need to use irregular stone and dry stack them, or maybe even concrete them together so they don’t move all over the place. You don’t have to dig down. A simple ring of stone will be fine just like you probably remember from camping. If you concrete them, be sure to allow for drainage so it doesn’t turn into a small doggie pool. The basic idea here is to create a way to contain the fire and coals so you can enjoy it with friends and family.
Thanks Christian so much for your wonderful tips and all your help. I might give it a try this weekend
Hi Christian, five years later how is it holding up? I was told I needed to dig 12″ footings for my seat wall and pillars. Also told to dig a 2′ x 12″ hole in the middle of the firepit (filled with crushed limestone) for drainage. What do you think? Have you had trouble with settling, or has it endured fine as-is? I also see you skipped the compacting of the gravel and the bed of sand layer. Did you glue the seat wall pieces together with caulk? Just curious what’s necessary.
Michelle, I think those are great ideas. In fact, the instructions do a few of those things, like digging a hole for the pit, using crushed limestone (paver base). We didn’t skip compacting the paver base. We used a 10 lbs manual compacter. We did not glue the wall pieces, but that is a great idea as long as you know you won’t redesign it. I’d give it a few uses before gluing it. We are not at the property where that one was built, but it’s still together and looks great.
Christian, I love your design! I was wondering, based on your pics, if you built up the back of the wall with the dirt you took out to make the fire pit? Also, what sizes were the manufactured blocks that you used in the project? Thanks so much for your help!
Cynthia, the dirt that was removed was moved to another section of the yard. It could have been put behind the wall, but that would require either cementing or bonding the blocks together to retain the weight of the dirt. These blocks came from Lowes, and I believe they were about 6 inches tall and 10-12 inches wide. The tiles on the floor were pavers at roughly 6×8 and the large square blocks were about as big as the back wall blocks but rectangular. Glad you enjoy the design! The current home owners are pleased and still enjoying the fire pit to this day.
listing the materials used would be good help. Don’t know if you are using sand, crushed rock or what and what about drainage.
Each photo is captioned with instructions and materials used, but yes – sand and paver base is used. There is no drainage as the footprint for this particular design is very small. Usually with this type construction, rain soaks directly into the ground below.
would you mind sending me your step by step instructions and pictures. My wife and I would like to build this in our backyard. Thanks! Dtemesvary62@gmail.com